Category:South Africa Military heraldry (images)
Jump to navigation
Jump to search
 |
 Civic heraldry of South Africa |
|
Images of military heraldry of South Africa.
Media in category "South Africa Military heraldry (images)"
The following 519 files are in this category, out of 519 total.
 1 Engineer Regiment, South West African Territorial Force.jpg 1,156 × 1,344; 255 KB
 1 Logistics Brigade, South West African Territorial Force.jpg 1,315 × 1,452; 233 KB
 1 Medium Workshop, South West African Territorial Force.jpg 1,363 × 1,565; 358 KB
 1 South West Africa Specialist Unit, South West African Territorial Force.jpg 1,050 × 1,230; 185 KB
 1 Special Training Unit, South African Army.png 800 × 380; 225 KB
 101 Air Supply Unit, South African Army.jpg 383 × 456; 31 KB
 101 Battalion, South West African Territorial Force.jpg 1,067 × 1,262; 205 KB
 101 Field Workshop, South African Army.jpg 226 × 231; 11 KB
 102 Battalion, South West African Territorial Force.jpg 1,124 × 1,340; 198 KB
 102 Field Workshop, South African Army.jpg 231 × 231; 11 KB
 10th Anti Aircraft Regiment, South African Army.jpg 800 × 404; 65 KB
 10th South African Infantry Battalion, South African Army.jpg 799 × 387; 40 KB
 11 Commando, South African Army.jpg 200 × 242; 13 KB
 11 Maintenance Unit, South African Army.jpg 217 × 234; 13 KB
 121st South African Infantry Battalion, South African Army.jpg 796 × 522; 62 KB
 14th Artillery Regiment, South African Army.png 200 × 234; 82 KB
 14th South African Infantry Battalion, South African Army.jpg 200 × 240; 11 KB
 15 Maintenance Unit, South African Army.jpg 245 × 246; 13 KB
 15th South African Infantry Battalion, South African Army.jpg 267 × 346; 40 KB
 16 Maintenance Unit, South African Army.jpg 230 × 230; 13 KB
 16th Group, South African Army.jpg 1,398 × 1,585; 265 KB
 17th Field Artillery Regiment, South African Army.png 200 × 236; 41 KB
 17th Group, South African Army.jpg 1,373 × 1,587; 258 KB
 18 Light Regiment, South African Artillery, South African Army.jpg 359 × 440; 22 KB
 18th Group, South African Army.jpg 1,149 × 1,331; 167 KB
 19 Maintenance Unit, South African Army.jpg 215 × 226; 13 KB
 19th Group, South African Army.jpg 1,200 × 1,600; 379 KB
 1st Battalion, Ciskei Army.jpg 1,200 × 1,600; 410 KB
 1st Parachute Battalion, South African Army.jpg 221 × 264; 10 KB
 1st South African Division, South African Army.png 231 × 302; 7 KB
 1st South African Infantry Battalion, South African Army.jpg 419 × 497; 51 KB
 1st South African Infantry Battalion, South African Army2.jpg 799 × 478; 80 KB
 1st South African Infantry Regiment, South African Army.jpg 607 × 247; 34 KB
 1st South African Tank Regiment, South African Army.jpg 417 × 504; 37 KB
 1st Special Service Battalion, South African Army.jpg 183 × 215; 10 KB
 1st Special Service Battalion, South African Army2.jpg 800 × 399; 57 KB
 201 Battalion, South West African Territorial Force.jpg 1,249 × 1,455; 201 KB
 20th Group, South African Army.jpg 1,072 × 1,235; 173 KB
 29th Group, South African Army.jpg 1,200 × 1,600; 454 KB
 2nd South African Infantry Battalion, South African Army.jpg 275 × 341; 26 KB
 2nd South African Infantry Battalion, South African Army2.jpg 800 × 455; 62 KB
 2nd South African Infantry Regiment, South African Army.jpg 750 × 347; 45 KB
 2nd Special Service Battalion, South African Army.jpg 754 × 409; 53 KB
 30 Field Workshop, South African Army.jpg 218 × 233; 8 KB
 31 Field Workshop, South African Army.jpg 226 × 231; 10 KB
 32 Field Workshop, South African Army.jpg 227 × 237; 10 KB
 36th Group, South African Army.jpg 1,200 × 1,600; 423 KB
 37 Field Workshop, South African Army.jpg 208 × 231; 11 KB
 3rd South African Infantry Battalion, South African Army.jpg 800 × 451; 57 KB
 3rd South African Infantry Regiment, South African Army.jpg 767 × 338; 45 KB
 4 Maintenance Unit, South African Army.jpg 232 × 234; 13 KB
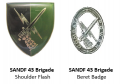 43 Brigade, South African Army.png 359 × 252; 95 KB
 44 Maintenance Unit, South African Army.jpg 220 × 227; 11 KB
 44 Medical Task Group, SAMHS.jpg 640 × 760; 64 KB
 44 Parachute Anti-Aircraft Regiment, South African Army.jpg 398 × 457; 24 KB
 44 Pathfinder Platoon, South African Army.jpg 182 × 219; 8 KB
 44 Signals Squadron, South African Army.jpg 373 × 452; 26 KB
 45th Group, South African Army.jpg 1,322 × 1,556; 309 KB
 46 Brigade, South African Army.jpg 497 × 599; 51 KB
 4th Field Artillery Regiment, South African Army.jpg 516 × 600; 45 KB
 4th South African Infantry Battalion, South African Army.jpg 477 × 564; 77 KB
 4th South African Infantry Regiment, South African Army.jpg 800 × 319; 43 KB
 5th Group. South African Army.jpg 1,415 × 1,600; 279 KB
 5th South African Infantry Battalion, South African Army.png 412 × 490; 353 KB
 6 Medical Battalion Group, SAMHS.jpg 710 × 600; 49 KB
 6th Light Anti Aircraft Regiment, South African Army.jpg 200 × 257; 8 KB
 6th Light Anti Aircraft Regiment, South African Army2.jpg 800 × 482; 43 KB
 6th South African Armoured Division, South African Army.png 320 × 280; 8 KB
 6th South African Infantry Battalion, South African Army.jpg 800 × 455; 53 KB
 71 Brigade, South African Army.png 800 × 334; 166 KB
 71 Field Workshop, South African Army.jpg 236 × 232; 8 KB
 72 Brigade, South African Army.png 582 × 385; 190 KB
 73 Motorised Brigade, South African Army.png 800 × 290; 172 KB
 7th Light Anti Aircraft Regiment, South African Army.jpg 200 × 231; 10 KB
 7th Medium Regiment, South African Artillery, South African Army.jpg 200 × 236; 11 KB
 7th South African Division, South African Army.jpg 455 × 565; 59 KB
 7th South African Infantry Battalion, South African Army.jpg 800 × 551; 79 KB
 81 Armoured Brigade, South African Army.png 581 × 356; 179 KB
 84 Motorised Brigade, South African Army.png 611 × 411; 229 KB
 8th Group, South African Army.jpg 1,266 × 1,440; 229 KB
 8th South African Infantry Battalion, South African Army.jpg 800 × 451; 72 KB
 91 Brigade, South West African Territorial Force.jpg 1,286 × 1,600; 286 KB
 91 Field Ambulance, South West African Territorial Force.jpg 1,200 × 1,600; 428 KB
 91 Field Artillery Regiment, South West African Territorial Force.jpg 1,200 × 1,600; 301 KB
 91 Field Workshop, South West African Territorial Force.jpg 1,200 × 1,600; 323 KB
 91 Maintenance Unit, South West African Territorial Force.jpg 1,200 × 1,600; 452 KB
 912 Battalion, South West African Territorial Force.jpg 1,200 × 1,600; 490 KB
 9th SA Division Provost Unit, South African Army.jpg 498 × 600; 45 KB
 9th SA Division Workshop, South African Army.jpg 188 × 224; 12 KB
 9th South African Division, South African Army.png 717 × 410; 259 KB
 9th South African Infantry Battalion, South African Army.jpg 356 × 436; 48 KB
 Air Force Base Bloemspruit, South African Air Force.jpg 108 × 108; 21 KB
 Air Force Base Durban, South African Air Force.jpg 108 × 108; 20 KB
 Air Force Base Hoedspruit, South African Air Force.jpg 108 × 108; 23 KB
 Air Force Base Langebaanweg, South African Air Force.jpg 137 × 139; 11 KB
 Air Force Base Makhado, South African Air Force.jpg 108 × 108; 21 KB
 Air Force Base Overberg, South African Air Force.jpg 127 × 140; 8 KB
 Air Force Base Swartkop, South African Air Force.jpg 101 × 108; 21 KB
 Air Force Base Waterkloof, South African Air Force.jpg 108 × 108; 22 KB
 Air Force Base Ysterplaat, South African Air Force.jpg 120 × 169; 8 KB
 Air Force Gymnasium, South African Air Force.jpg 131 × 171; 22 KB
 Air Force Mobile Deployment Wing, South African Air Force.jpg 108 × 108; 5 KB
 Air Force Publication Centre, South African Air Force.jpg 131 × 123; 20 KB
 Air Force Station Thaba Tshwane, South African Air Force.jpg 108 × 108; 21 KB
 Airspace Control Unit, South African Air Force.jpg 131 × 143; 18 KB
 Anti Aircraft School, South African Army.jpg 400 × 480; 76 KB
 Armoured Formation, South African Army.jpg 231 × 311; 26 KB
 Army College, South African Army.jpg 800 × 366; 42 KB
 Army Combat Training Centre, South African Army.jpg 523 × 600; 38 KB
 Army Headquarters, South African Army.jpg 1,165 × 1,316; 186 KB
 Army Support Base Eastern Cape, South African Army.jpg 231 × 233; 11 KB
 Army Support Base Johannesburg, South African Army.jpg 217 × 231; 10 KB
 Army Support Base Kimberley, South African Army.jpg 218 × 239; 12 KB
 Army Support Base KwaZulu-Natal, South African Army.jpg 222 × 228; 12 KB
 Army Support Base Limpopo, South African Army.jpg 200 × 227; 11 KB
 Army Support Base Mpumalanga, South African Army.jpg 240 × 233; 11 KB
 Army Support Base Potchefstroom, South African Army.jpg 209 × 241; 11 KB
 Army Support Base Western Cape, South African Army.jpg 211 × 233; 13 KB
 Belfast Commando, South African Army.jpg 604 × 379; 36 KB
 Benoni Commando, South African Army.jpg 800 × 329; 42 KB
 Bethel Commando, South African Army.jpg 616 × 371; 39 KB
 Bloemfontein City Commando, South African Army.jpg 799 × 438; 50 KB
 Bloemhof Commando, South African Army.jpg 767 × 380; 47 KB
 Boegoeberg Commando, South African Army.jpg 799 × 503; 56 KB
 Boksburg Commando, South African Army.jpg 643 × 358; 40 KB
 Bopuhthatswana Logistic Corps.jpg 1,600 × 1,469; 392 KB
 Bopuhthatswana Presidential Guard.jpg 1,571 × 1,600; 487 KB
 Bopuhthatswana Special Forces.jpg 1,600 × 1,200; 433 KB
 Bothaville Commando, South African Army.jpg 723 × 339; 43 KB
 Brandfort Commando, South African Army.jpg 648 × 431; 43 KB
 Broederstroom Commando, South African Army.jpg 708 × 391; 44 KB
 Bronkhorstspruit Commando, South African Army.jpg 716 × 310; 40 KB
 Buffalo Volunteer Rifles, South African Army.jpg 424 × 512; 41 KB
 Bushveld Airspace Control Sector, South African Air Force.jpg 112 × 135; 8 KB
 Cachet Commando, South African Army.jpg 608 × 418; 43 KB
 Cadet Corps, South West African Territorial Force.jpg 1,175 × 1,325; 251 KB
 Calendon (or Overberg) Commando, South African Army.jpg 712 × 399; 43 KB
 Calendon River Commando, South African Army.jpg 652 × 395; 40 KB
 Calvinia Commando, South African Army.jpg 692 × 346; 46 KB
 Cape Field Artillery, South African Army.jpg 517 × 599; 32 KB
 Cape Flats Commando, South African Army.jpg 784 × 381; 48 KB
 Cape Garrison Artillery, South African Army.jpg 524 × 599; 36 KB
 Cape Town Highlanders, South African Army.png 799 × 220; 138 KB
 Cape Town Rifles, South African Army.jpg 482 × 600; 57 KB
 Cape Town Rifles, South African Army2.jpg 170 × 208; 18 KB
 Carolina Commando, South African Army.jpg 621 × 315; 30 KB
 Cately Commando, South African Army.jpg 650 × 388; 42 KB
 Central Flying Training School, South African Air Force.jpg 434 × 600; 89 KB
 Central Photographic Institute, South African Air Force.jpg 131 × 145; 18 KB
 Christiana Commando, South African Army.jpg 609 × 415; 37 KB
 Coligny Commando, South African Army.jpg 365 × 260; 23 KB
 Combined Auction Centre, South African Air Force.jpg 131 × 123; 13 KB
 De Aar Commando, South African Army.jpg 588 × 298; 34 KB
 Department of Defence Main Ordnance Depot, South African Army.jpg 236 × 231; 13 KB
 Department of Defence Mobilisation Centre, South African Army.jpg 232 × 229; 10 KB
 Dliold.jpg 169 × 187; 21 KB
 Dog Centre, South African Army.jpg 799 × 339; 49 KB
 Donkin Commando, South African Army.jpg 800 × 318; 41 KB
 Dundee Commando, South African Army.jpg 562 × 277; 32 KB
 Durban Light Infantry, South African Army.jpg 577 × 588; 77 KB
 Durban North Commando, South African Army.jpg 800 × 497; 64 KB
 Durban Regiment, South African Army.jpg 770 × 599; 93 KB
 Durban South Commando, South African Army.jpg 800 × 381; 49 KB
 Eastern Province Command Workshop, South African Army.jpg 1,318 × 1,550; 346 KB
 Eastern Province Command Workshop, South African Army2.jpg 1,200 × 1,600; 395 KB
 Eastern Province Command, South African Army.png 229 × 270; 19 KB
 Ellisras Reporting Unit, South African Air Force.jpg 131 × 161; 17 KB
 Equestrian Centre, South African Army.jpg 799 × 317; 54 KB
 Ermelo Commando, South African Army.jpg 262 × 304; 25 KB
 False Bay Commando, South African Army.jpg 341 × 400; 26 KB
 Far North Command Provost Unit, South African Army.jpg 1,200 × 1,600; 554 KB
 Fauresmith Commando, South African Army.jpg 314 × 378; 28 KB
 Ficksburg Commando, South African Army.jpg 199 × 238; 15 KB
 First City, South African Army.jpg 800 × 388; 46 KB
 Flight Test and Development Centre, South African Air Force.jpg 128 × 140; 11 KB
 Frankfort Commando, South African Army.jpg 309 × 363; 31 KB
 Germiston Commando, South African Army.jpg 636 × 353; 40 KB
 Gordonia Commando, South African Army.jpg 589 × 401; 42 KB
 Graaff Reinet Commando, South African Army.jpg 319 × 376; 30 KB
 Griqualand East Commando, South African Army.jpg 586 × 272; 31 KB
 Groot Marico Commando, South African Army.jpg 1,360 × 1,600; 237 KB
 Hantam Commando, South African Army.jpg 320 × 376; 24 KB
 Harrismith Commando, South African Army.jpg 361 × 428; 29 KB
 Hartebeespoort Commando, South African Army.jpg 799 × 363; 44 KB
 Hay Commando, South African Army.jpg 759 × 259; 32 KB
 Heidelberg Commando, South African Army.jpg 794 × 311; 39 KB
 Heilbron Commando, South African Army.jpg 643 × 422; 44 KB
 Herbert Commando, South African Army.jpg 617 × 309; 42 KB
 Highway Commando, South African Army.jpg 293 × 353; 20 KB
 Hoopstad Commando, South African Army.jpg 641 × 436; 48 KB
 Hopetown Commando, South African Army.jpg 682 × 443; 44 KB
 Humansdorp Commando, South African Army.jpg 659 × 403; 41 KB
 Industrial Commando Naschem, South African Army.jpg 447 × 534; 34 KB
 Infantry Formation, South African Army.jpg 296 × 329; 34 KB
 Insele Commando, South African Army.jpg 712 × 389; 47 KB
 Irene Commando, South African Army.jpg 582 × 395; 39 KB
 Jacobsdal Commando, South African Army.jpg 621 × 403; 40 KB
 Johannesburg East Commando, South African Army.jpg 799 × 344; 45 KB
 Johannesburg West Commando, South African Army.jpg 507 × 315; 27 KB
 Kalahari Commando, South African Army.jpg 779 × 422; 49 KB
 Karoo Commando, South African Army.jpg 1,280 × 1,449; 251 KB
 Kempton Park Commando, South African Army.png 800 × 397; 200 KB
 Kimberley Regiment, South African Army.jpg 579 × 599; 82 KB
 Kimberly Commando, South African Army.jpg 800 × 358; 44 KB
 Kirkwood Commando, South African Army.jpg 708 × 316; 37 KB
 Klein Karoo Commando, South African Army.jpg 800 × 369; 47 KB
 Klerksdorp Commando, South African Army.jpg 642 × 425; 44 KB
 Knysna Commando, South African Army.jpg 462 × 384; 48 KB
 Koeberg Commando, South African Army.jpg 800 × 390; 61 KB
 Koppies Commando, South African Army.jpg 660 × 466; 44 KB
 Koster Commando, South African Army.jpg 338 × 414; 27 KB
 Kroonstad Commando, South African Army.jpg 665 × 387; 47 KB
 Kruger National Park Commando, South African Army.jpg 800 × 390; 42 KB
 Ladybrand Commando, South African Army.jpg 631 × 441; 50 KB
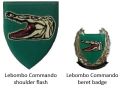 Lebombo Commando, South African Army.jpg 360 × 265; 23 KB
 Letaba Commando, South African Army.jpg 799 × 284; 51 KB
 Lichtenburg Commando, South African Army.jpg 800 × 395; 52 KB
 Light Horse Regiment, South African Army.jpg 800 × 362; 53 KB
 Limpopo Commando, South African Army.jpg 638 × 469; 47 KB
 Lindley Commando, South African Army.jpg 210 × 255; 16 KB
 Lions Head Commando, South African Army.jpg 800 × 377; 55 KB
 Long Tom Commando, South African Army.jpg 730 × 446; 49 KB
 Lowveld Airspace Control Sector, South African Air Force.jpg 131 × 143; 20 KB
 Lydenburg Commando, South African Army.jpg 614 × 363; 38 KB
 Mafikeng Goosen Commando, South African Army.jpg 647 × 468; 47 KB
 Magdol Commando, South African Army.jpg 800 × 312; 50 KB
 Midland Commando, South African Army.jpg 800 × 294; 49 KB
 Midmar Commando, South African Army.jpg 556 × 364; 37 KB
 Military School, Bopuhthatswana Army.jpg 1,200 × 1,600; 519 KB
 Mobile Medical Brigade, SAMHS.png 454 × 599; 96 KB
 Modderfontein Commando, South African Army.jpg 666 × 390; 40 KB
 Moot Commando, South African Army.jpg 579 × 365; 38 KB
 Mosselbay Commando, South African Army.jpg 656 × 259; 32 KB
 Munitoria Commando, South Africa Army.jpg 799 × 396; 53 KB
 Murraydeen Commando, South African Army.jpg 632 × 401; 38 KB
 Natal Carbineers, South African Army.jpg 800 × 271; 34 KB
 Natal Command Workshop, South African Army.jpg 1,384 × 1,549; 237 KB
 Natal Command, South African Army.png 229 × 270; 20 KB
 Natal Field Artillery, South African Army.jpg 642 × 500; 54 KB
 Natal Mounted Rifles, South African Army.jpg 331 × 383; 23 KB
 Natal Mounted Rifles, South African Army2.jpg 800 × 389; 53 KB
 National Ceremonial Guard, South African Army.jpg 230 × 230; 10 KB
 Naval Band, South African Navy.jpg 206 × 281; 36 KB
 Naval College, South African Navy.jpg 205 × 275; 32 KB
 Naval Police, South African Navy.jpg 209 × 286; 40 KB
 Nelspruit Commando, South African Army.jpg 794 × 423; 50 KB
 Nigel Commando, South African Army.jpg 542 × 333; 33 KB
 No 1 Air Servicing Unit, South African Air Force.jpg 131 × 164; 18 KB
 No 1 Squadron, South African Air Force.png 364 × 366; 173 KB
 No 10 Air Depot, South African Air Force.jpg 131 × 170; 17 KB
 No 101 Squadron, South African Air Force.jpg 131 × 133; 17 KB
 No 102 Squadron, South African Air Force.jpg 131 × 155; 20 KB
 No 103 Commando Squadron, South African Air Force.jpg 323 × 330; 29 KB
 No 104 Squadron, South African Air Force.jpg 131 × 140; 17 KB
 No 105 Squadron, South African Air Force.jpg 131 × 133; 16 KB
 No 106 Squadron, South African Air Force.jpg 131 × 139; 17 KB
 No 107 Squadron, South African Air Force.jpg 131 × 141; 17 KB
 No 109 Commando Squadron, South African Air Force.jpg 330 × 320; 93 KB
 No 11 Squadron, South African Air Force.jpg 131 × 150; 19 KB
 No 110 Squadron, South African Air Force.jpg 120 × 146; 9 KB
 No 111 Squadron, South African Air Force.jpg 131 × 146; 18 KB
 No 114 Squadron, South African Air Force.jpg 131 × 143; 18 KB
 No 12 Squadron, South African Air Force.jpg 131 × 174; 20 KB
 No 142 Squadron, South African Air Force.jpg 131 × 167; 26 KB
 No 15 Squadron, South African Air Force.jpg 310 × 330; 26 KB
 No 16 Squadron, South African Air Force.jpg 327 × 330; 26 KB
 No 17 Squadron, South African Air Force.jpg 269 × 330; 83 KB
 No 19 Squadron, South African Air Force.jpg 269 × 330; 23 KB
 No 2 Air Servicing Unit, South African Air Force.jpg 108 × 136; 8 KB
 No 2 Squadron, South African Air Force.jpg 156 × 126; 11 KB
 No 21 Squadron, South African Air Force.jpg 330 × 233; 15 KB
 No 22 Squadron, South African Air Force.jpg 295 × 330; 91 KB
 No 24 Squadron, South African Air Force.jpg 131 × 136; 17 KB
 No 25 Squadron, South African Air Force.jpg 312 × 330; 26 KB
 No 26 Squadron, South African Air Force.jpg 131 × 150; 8 KB
 No 27 Squadron, South African Air Force.jpg 131 × 175; 18 KB
 No 28 Squadron, South African Air Force.jpg 174 × 137; 13 KB
 No 3 Medium Bomber Wing, South African Air Force.png 454 × 338; 197 KB
 No 3 Squadron, South African Air Force.jpg 131 × 116; 16 KB
 No 30 Squadron, South African Air Force.jpg 131 × 165; 20 KB
 No 35 Squadron, South African Air Force.jpg 174 × 169; 17 KB
 No 4 Squadron, South African Air Force.jpg 131 × 115; 16 KB
 No 40 Squadron, South African Air Force.jpg 272 × 330; 22 KB
 No 41 Squadron, South African Air Force.jpg 174 × 131; 10 KB
 No 42 Squadron, South African Air Force.jpg 212 × 330; 61 KB
 No 44 Squadron, South African Air Force.jpg 173 × 112; 10 KB
 No 5 Air Servicing Unit, South African Air Force.jpg 131 × 168; 20 KB
 No 5 Squadron, South African Air Force.jpg 131 × 119; 15 KB
 No 500 Squadron, South African Air Force.jpg 131 × 161; 16 KB
 No 503 Squadron, South African Air Force.jpg 131 × 158; 8 KB
 No 504 Squadron, South African Air Force.jpg 131 × 153; 17 KB
 No 505 Squadron, South African Air Force.jpg 120 × 145; 10 KB
 No 514 Squadron, South African Air Force.jpg 131 × 149; 17 KB
 No 515 Squadron, South African Air Force.jpg 131 × 167; 15 KB
 No 525 Squadron, South African Air Force.jpg 129 × 138; 9 KB
 No 526 Squadron, South African Air Force.jpg 126 × 138; 9 KB
 No 6 Air Servicing Unit, South African Air Force.jpg 150 × 189; 24 KB
 No 6 Squadron, South African Air Force.jpg 131 × 153; 16 KB
 No 60 Squadron, South African Air Force.jpg 174 × 169; 16 KB
 No 68 Air School, South African Air Force.jpg 131 × 154; 17 KB
 No 7 Squadron, South African Air Force.jpg 131 × 139; 15 KB
 No 84 Light Aircraft Flying School, South African Air Force.jpg 131 × 160; 11 KB
 No 85 Advanced Flying School, South African Air Force.jpg 322 × 330; 26 KB
 No 86 Multi-Engine Flying School, South African Air Force.jpg 131 × 176; 21 KB
 No 87 Helicopter Flying School, South African Air Force.jpg 174 × 169; 20 KB
 No 89 Combat Flying School, South African Air Force.jpg 131 × 153; 18 KB
 Noordvaal Commando, South African Army.jpg 1,172 × 1,340; 192 KB
 North West Command Maintenance Unit, South African Army.jpg 1,200 × 1,600; 468 KB
 North West Command Provost Unit, South African Army.jpg 1,200 × 1,600; 421 KB
 North West Command Signals Unit, South African Army.jpg 1,200 × 1,600; 451 KB
 North West Command Workshop, South African Army.jpg 1,200 × 1,600; 482 KB
 Northam Commando, South African Army.jpg 736 × 356; 43 KB
 Northern Natal Commando, South African Army.jpg 1,317 × 1,541; 262 KB
 Northern Transvaal Command Maintenance Unit, South African Army.jpg 1,200 × 1,600; 475 KB
 Northern Transvaal Command Provost Unit, South African Army.jpg 1,200 × 1,600; 433 KB
 Odendaalsrus Commando, South African Army.jpg 642 × 391; 55 KB
 Orange Free State Command Signals Unit, South African Army.jpg 1,390 × 1,600; 269 KB
 Orange Free State Command Workshop, South African Army.jpg 1,272 × 1,405; 228 KB
 Orange Free State Command, South African Army.png 229 × 270; 27 KB
 Oranje Commando, South African Army.jpg 640 × 278; 28 KB
 Oribi Commando, South African Army.jpg 727 × 356; 42 KB
 Orkney Commando, South African Army.jpg 653 × 464; 46 KB
 Oudtshoorn Commando, South African Army.jpg 726 × 397; 47 KB
 Outeniqua Commando, South African Army.jpg 784 × 415; 44 KB
 Parys Commando, South African Army.png 730 × 408; 313 KB
 Phalaborwa Commando, South African Army.jpg 449 × 536; 29 KB
 Philippolis Commando, South African Army.jpg 800 × 380; 40 KB
 Piet Retief Commando, South African Army.jpg 561 × 271; 31 KB
 Pietersburg Commando, South African Army.jpg 797 × 395; 55 KB
 Piketberg Commando, South African Army.jpg 656 × 431; 42 KB
 Pongola Commando, South African Army.jpg 728 × 395; 47 KB
 Port Elizabeth Commando, South African Army.jpg 800 × 499; 58 KB
 Potchefstroom Commando, South African Army.jpg 668 × 422; 46 KB
 Potgietersrus Commando, South African Army.jpg 664 × 282; 35 KB
 Praal Commando, South African Army.jpg 247 × 296; 23 KB
 Pretoria East Commando, South African Army.jpg 645 × 302; 41 KB
 Pretoria Regiment, South African Army.jpg 800 × 301; 48 KB
 Prieska Commando, South African Army.jpg 345 × 405; 29 KB
 Prince Alfred's Guard, South African Army.jpg 800 × 344; 43 KB
 Queenstown Commando, South African Army.jpg 799 × 408; 58 KB
 Rand Light Infantry, South African Army.png 266 × 337; 35 KB
 Rand Light Infantry, South African Army2.gif 549 × 599; 139 KB
 Randburg Commando, South African Army.jpg 690 × 425; 43 KB
 Recife Commando, South African Army.jpg 577 × 407; 34 KB
 Regiment Bloemspruit, South African Army.jpg 707 × 422; 53 KB
 Regiment Botha, South African Army.jpg 800 × 446; 60 KB
 Regiment Christiaan Beyers, South African Army.jpg 404 × 491; 32 KB
 Regiment de la Rey, South African Army.jpg 800 × 480; 67 KB
 Regiment De Wet, South African Army.jpg 800 × 427; 55 KB
 Regiment Groot Karoo, South African Army.jpg 800 × 408; 61 KB
 Regiment Mooirivier South African Army.jpg 763 × 403; 48 KB
 Regiment Northern Transvaal, South African Army.jpg 800 × 448; 66 KB
 Regiment Oos Rand, South African Army.jpg 800 × 378; 51 KB
 Regiment Oos Transvaal, South African Army.jpg 352 × 406; 28 KB
 Regiment Oranjerivier, South African Army.jpg 800 × 365; 42 KB
 Regiment Overvaal, South African Army.jpg 619 × 477; 40 KB
 Regiment Paul Kruger, South African Army.jpg 799 × 388; 52 KB
 Regiment Piet Retief, South African Army.jpg 800 × 347; 52 KB
 Regiment Potchefstroom Universiteit, South African Army.jpg 799 × 401; 54 KB
 Regiment President Steyn, South African Army.jpg 800 × 374; 61 KB
 Regiment Schoonspruit, South African Army.jpg 800 × 369; 54 KB
 Regiment University of Witwatersrand, South African Army.png 505 × 330; 109 KB
 Regiment Vaalrivier, South African Army.jpg 800 × 409; 46 KB
 Regiment Vrystaat, South African Army.jpg 800 × 514; 52 KB
 Regiment Westelike Provinsie, South African Army.jpg 800 × 292; 39 KB
 Reitz Commando, South African Army.jpg 649 × 340; 35 KB
 Rustenburg Commando, South African Army.jpg 697 × 422; 47 KB
 SA Army Technical Service Training Centre, South African Army.jpg 218 × 200; 10 KB
 Sandrivier Commando, South African Army.jpg 585 × 392; 35 KB
 Sandton Commando, South African Army.jpg 647 × 380; 41 KB
 SAS Bluff, South African Navy.jpg 204 × 271; 31 KB
 SAS Diaz, South African Navy.jpg 206 × 274; 33 KB
 SAS Donkin, South African Navy.jpg 205 × 278; 37 KB
 SAS Drommedaris, South African Navy.jpg 203 × 272; 37 KB
 SAS Durban, South African Navy.jpg 203 × 275; 32 KB
 SAS East London, South African Navy.jpg 201 × 271; 31 KB
 SAS Emily Hobhouse, South African Navy.jpg 206 × 273; 37 KB
 SAS Fleur, South African Navy.jpg 205 × 272; 30 KB
 SAS Gelderland, South African Navy.jpg 205 × 272; 34 KB
 SAS Good Hope, South African Navy.jpg 207 × 271; 35 KB
 SAS Haerlem, South African Navy.jpg 201 × 276; 32 KB
 SAS Inkonkoni, South African Navy.jpg 202 × 271; 33 KB
 SAS Jan Smuts, South African Navy.jpg 427 × 600; 52 KB
 SAS Jan van Riebeeck, South African Navy.jpg 205 × 271; 33 KB
 SAS Johanna van der Merwe, South African Navy.jpg 207 × 274; 34 KB
 SAS Johannesburg, South African Navy.jpg 205 × 271; 36 KB
 SAS Kaapstad, South African Navy.jpg 204 × 270; 32 KB
 SAS Kimberley, South African Navy.jpg 201 × 276; 35 KB
 SAS Maria van Riebeeck, South African Navy.jpg 209 × 278; 37 KB
 SAS Mosselbaai, South African Navy.jpg 205 × 273; 35 KB
 SAS Natal, South African Navy.jpg 204 × 275; 37 KB
 SAS Nautilus, South African Navy.jpg 205 × 269; 38 KB
 SAS Oosterland, South African Navy.jpg 205 × 270; 37 KB
 SAS Pietermaritzburg, South African Navy.jpg 203 × 272; 29 KB
 SAS Port Elizabeth, South African Navy.jpg 204 × 270; 38 KB
 SAS Port Rex, South African Navy.jpg 201 × 273; 37 KB
 SAS President Kruger, South African Navy.jpg 205 × 270; 32 KB
 SAS President Pretorious, South African Navy.jpg 204 × 270; 34 KB
 SAS President Steyn, South African Navy.jpg 203 × 269; 38 KB
 SAS Pretoria, South African Navy.jpg 205 × 270; 37 KB
 SAS Protea, South African Navy.jpg 201 × 268; 33 KB
 SAS Rand, South African Navy.jpg 204 × 274; 35 KB
 SAS Reijger, South African Navy.jpg 203 × 270; 39 KB
 SAS Saldanha, South African Navy.jpg 204 × 275; 35 KB
 SAS Scorpion, South African Navy.jpg 426 × 599; 53 KB
 SAS Simon van der Stel, South African Navy.jpg 205 × 271; 33 KB
 SAS Simonsberg, South African Navy.jpg 207 × 272; 30 KB
 SAS Somerset, South African Navy.jpg 204 × 270; 29 KB
 SAS Tafelberg, South African Navy.jpg 206 × 273; 31 KB
 SAS Transvaal, South African Navy.jpg 206 × 272; 36 KB
 SAS Unitie, South African Navy.jpg 164 × 274; 33 KB
 SAS Vrystaat, South African Navy.jpg 204 × 274; 30 KB
 SAS Walvisbaai, South African Navy.jpg 206 × 273; 41 KB
 SAS Windhoek, South African Navy.jpg 207 × 271; 31 KB
 SAS Wingfield, South African Navy.jpg 206 × 271; 34 KB
 SASOL Commando, South African Army.png 800 × 263; 112 KB
 Schanskop Commando, South African Army.jpg 850 × 409; 49 KB
 School of Armour, South African Army.jpg 800 × 327; 56 KB
 School of Artillery, South African Army.jpg 497 × 599; 29 KB
 School of Cookery, South African Air Force.jpg 121 × 146; 17 KB
 Schweizer Reneke Commando, South African Army.jpg 337 × 409; 26 KB
 Sector 10 Signal Unit, South West African Territorial Force.jpg 1,200 × 1,600; 538 KB
 Secunda Commando, South African Army.jpg 627 × 395; 36 KB
 Senekal Commando, South African Army.jpg 719 × 364; 44 KB
 Sishen Commando, South African Army.jpg 852 × 339; 45 KB
 Skeirieland Commando, South African Army.jpg 759 × 394; 49 KB
 Smithfield Commando, South African Army.jpg 662 × 377; 37 KB
 South African Air Force Band.jpg 137 × 181; 18 KB
 South African Air Force Police.jpg 131 × 164; 17 KB
 South African Air Force Telecommunications Centre.jpg 131 × 162; 16 KB
 South African Air Force.png 455 × 224; 42 KB
 South African Irish, South African Army.jpg 800 × 337; 53 KB
 South African Marine Corps, South African Navy.jpg 200 × 256; 12 KB
 South African Sea Cadets.jpg 317 × 448; 63 KB
 South Coast Commando, South African Army.jpg 654 × 461; 46 KB
 South West Africa Command Signal Unit, South African Army.jpg 1,152 × 1,357; 223 KB
 South West Africa Command Workshop, South African Army.jpg 1,200 × 1,600; 421 KB
 South West Africa Command, South African Army.jpg 329 × 371; 33 KB
 South West African Territorial Force Military School.jpg 1,199 × 1,389; 244 KB
 Soutpansberg Commando, South African Army.jpg 641 × 430; 44 KB
 Special Forces, Transkei Army.jpg 1,200 × 1,600; 648 KB
 Stellenbosch Commando, South African Army.jpg 800 × 330; 40 KB
 Stromberg Commando, South African Army.jpg 784 × 459; 87 KB
 Support Formation, South African Army.jpg 221 × 226; 11 KB
 Swartland Commando, South African Army.jpg 619 × 377; 41 KB
 Swellendam Commando, South African Army.jpg 649 × 419; 43 KB
 Thabazimbi Commando, South African Army.jpg 610 × 375; 39 KB
 Theunissen Commando, South African Army.jpg 600 × 385; 41 KB
 Training Formation, South African Army.jpg 316 × 426; 35 KB
 Training Ship Assegai, South African Sea Cadets.jpg 984 × 1,300; 158 KB
 Training Ship Attakwa, South African Sea Cadets.jpg 984 × 1,300; 180 KB
 Training Ship Bounty, South African Sea Cadets.jpg 984 × 1,300; 197 KB
 Training Ship Devonport, South African Sea Cadets.jpg 984 × 1,300; 206 KB
 Training Ship Drongo, South African Sea Cadets.jpg 984 × 1,300; 168 KB
 Training Ship Eagle, South African Sea Cadets.jpg 984 × 1,300; 180 KB
 Training Ship Excalibur, South African Sea Cadets.jpg 984 × 1,300; 162 KB
 Training Ship Fearless, South African Sea Cadets.jpg 984 × 1,300; 220 KB
 Training Ship Immortelle, South African Sea Cadets.jpg 984 × 1,300; 188 KB
 Training Ship iNyathi, South African Sea Cadets.jpg 984 × 1,300; 170 KB
 Training Ship Kingfisher, South African Sea Cadets.jpg 984 × 1,300; 193 KB
 Training Ship Knysna, South African Sea Cadets.jpg 984 × 1,300; 226 KB
 Training Ship Kromme, South African Sea Cadets.jpg 984 × 1,300; 180 KB
 Training Ship Laherne, South African Sea Cadets.jpg 984 × 1,300; 182 KB
 Training Ship Outeniqua, South African Sea Cadets.jpg 984 × 1,300; 198 KB
 Training Ship Owl, South African Sea Cadets.jpg 984 × 1,300; 202 KB
 Training Ship Rook, South African Sea Cadets.jpg 984 × 1,300; 170 KB
 Training Ship Springs, South African Sea Cadets.jpg 984 × 1,300; 178 KB
 Training Ship Tiburon, South African Sea Cadets.jpg 984 × 1,300; 173 KB
 Training Ship William Weller, South African Sea Cadets.jpg 984 × 1,300; 185 KB
 Training Ship Woltemade, South African Sea Cadets.jpg 984 × 1,300; 195 KB
 Training Ship Zwartkops, South African Sea Cadets.jpg 984 × 1,300; 220 KB
 Transkei Army Corps of Military Police.jpg 1,200 × 1,600; 540 KB
 Transkei Defence Force.jpg 891 × 883; 180 KB
 Transkei Mounted Battalion.jpg 1,200 × 1,600; 471 KB
 Transkei Mounted Battalion1.jpg 1,110 × 1,600; 444 KB
 Transvaal Horse Artillery, South African Army.jpg 657 × 600; 60 KB
 Transvaal Scottish, South African Army.jpg 800 × 413; 55 KB
 Transvaal State Artillery, South African Army.jpg 520 × 600; 41 KB
 Troop Information Unit, South African Army.jpg 279 × 337; 28 KB
 Tugela Commando, South African Army.jpg 671 × 303; 34 KB
 Tygerberg Commando, South African Army.jpg 473 × 277; 29 KB
 Umgeni Commando, South African Army.jpg 800 × 340; 49 KB
 Umkhombe Commando, South African Army.jpg 764 × 344; 37 KB
 Umkomaas Commando, South African Army.jpg 752 × 438; 47 KB
 Umvoti Mounted Rifles, South African Army.jpg 800 × 399; 75 KB
 University of Pretoria Regiment, South African Army.jpg 800 × 368; 48 KB
 Vanderbiljpark Commando, South African Army.jpg 800 × 421; 60 KB
 Venda Defence Force.png 749 × 393; 200 KB
 Ventersdorp Commando, South African Army.jpg 646 × 418; 43 KB
 Vereening Commando, South African Army.png 434 × 373; 191 KB
 Virginia Commando, South African Army.jpg 772 × 509; 52 KB
 Volksrust Commando, South African Army.jpg 612 × 367; 37 KB
 Vrede Commando, South African Army.jpg 540 × 288; 36 KB
 Vrystaatse Artillerie Regiment, South African Army.jpg 500 × 355; 32 KB
 Wakkerstrom Commando, South African Army.jpg 657 × 415; 45 KB
 Warmbad (Warmbaths) Commando, South African Army.jpg 614 × 367; 41 KB
 Waterberg Commando, South African Army.jpg 595 × 394; 41 KB
 Weenen Kliprivier Commando, South African Army.jpg 800 × 346; 60 KB
 Wemmers Pan Commando, South African Army.jpg 735 × 303; 39 KB
 West Coast Commando, South African Army.jpg 647 × 406; 42 KB
 Western Province Command Provost Unit, South African Army.jpg 1,200 × 1,600; 558 KB
 Western Province Command Signal Unit, South African Army.jpg 1,246 × 1,450; 289 KB
 Western Province Command, South African Army.png 229 × 270; 13 KB
 White River Commando, South African Army.jpg 650 × 376; 39 KB
 Winterberg Commando, South African Army.jpg 584 × 334; 34 KB
 Witbank Commando, South African Army.jpg 786 × 410; 52 KB
 Witwatersrand Command, South African Army.png 229 × 270; 18 KB
 Witwatersrand Rifles, South African Army.jpg 800 × 357; 38 KB
 Wolmaransstad Commando, South African Army.jpg 661 × 433; 46 KB
 Wonderboom Commando, South African Army.jpg 789 × 315; 38 KB
 Worcester Commando, South African Army.jpg 800 × 377; 63 KB
 Wynberg Commando, South African Army.jpg 784 × 278; 41 KB
 Zastron Commando, South African Army.png 682 × 438; 303 KB


_Commando,_South_African_Army.jpg)


,_South_African_Army.png)


,_South_African_Army.jpg)


_Commando,_South_African_Army.jpg)


